Days left in trimester 
Days left in trimester
Friday 02 10 06
Your stories will be available from

PLEASE do these exercises below before beginning today's work. We will have a written test on what I emphasized in our earlier lessons and you will need to know something about this tweening stuff as I tried to illustrate in a step-by-step manner below.
Today, we will look
at tweening some more - we did some of this two weeks ago 1-26 Thursday
![]() .
.
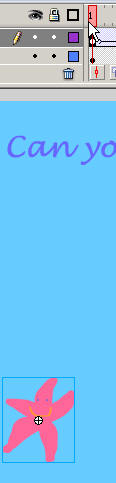
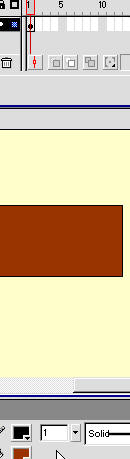
Then we used 'Create Motion Tween' to make things move, for example we said,
Your frames between your two keyframes will change colour and your object will move between the keyframes when we used motion tween and shape tweening.
![]()
The settings to modify a motion tween -
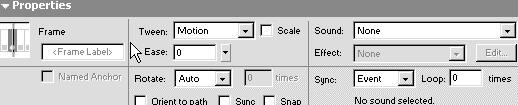
First off we can set
the Scale ![]() to what we
want it. To affect the size be sure it is on. Open the (Windows >) transform
menu -
to what we
want it. To affect the size be sure it is on. Open the (Windows >) transform
menu - ![]() In Frame
One
In Frame
One  change the
Transform setting to 50%
change the
Transform setting to 50%
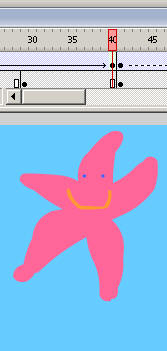
![]() and in frame 20
and in frame 20
![]() we will increase it back
to 100%
we will increase it back
to 100% 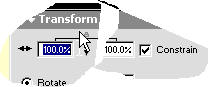 so that now with
scaling turned on
so that now with
scaling turned on 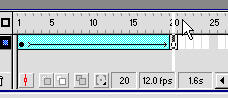 the object scales through the tween.
Next is the easing
tool 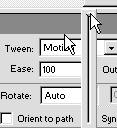 which can be
sent-out (a higher number) or in from zero to a negative one-hundred. If we
choose in our tween starts slow then speeds up, if we choose out then our tween
starts out fast and ends slow.
which can be
sent-out (a higher number) or in from zero to a negative one-hundred. If we
choose in our tween starts slow then speeds up, if we choose out then our tween
starts out fast and ends slow.
If you want something in your scene to slow down or come to a complete halt this is your baby.
We did the rotate
thing last week 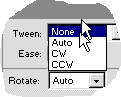 but
check it again - you can go any direction.
but
check it again - you can go any direction.
Shape tween
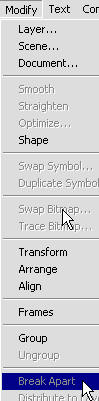
Shape tweens only work with objects drawn on the screen and not on text or instances.
First we have to
break the image apart by going to Modify > break apart
 then all shape
tweening is the same,
then all shape
tweening is the same,
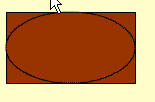
We will change a
rectangle into an oval.
 next we make
an oval - make in the same spot and size - firstly, make it on a new layer -
next we make
an oval - make in the same spot and size - firstly, make it on a new layer -
![]() and then with snap
guides on draw your oval inside the rectangle
and then with snap
guides on draw your oval inside the rectangle
 You want them on
the same layer so cut the oval =
You want them on
the same layer so cut the oval =
![]()
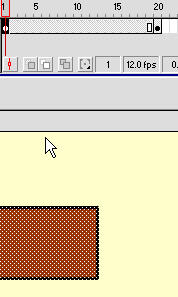
It is now sitting on
the clipboard. Make your tween 20 frames - remember to add the F6 to add the key
frame - 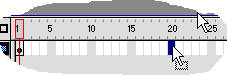 We do not
want the rectangle in frame 20 so delete it - remember that delete only deletes
the content in the frame and not the frame itself. Because we want the oval in
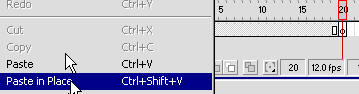
the same place as where the rectangle was we use Edit > Paste in Place
We do not
want the rectangle in frame 20 so delete it - remember that delete only deletes
the content in the frame and not the frame itself. Because we want the oval in
the same place as where the rectangle was we use Edit > Paste in Place
 Now the
oval is in the exact same place as the rectangle. Now we are ready to shape
tool. Select the first key frame
Now the
oval is in the exact same place as the rectangle. Now we are ready to shape
tool. Select the first key frame
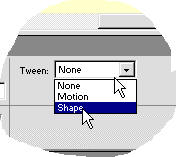
 and choose
shape tweening in properties >
and choose
shape tweening in properties >
 Use the
ease and blend dialogue boxes as we did for motion tweening above to get the
results that float your boat.
Use the
ease and blend dialogue boxes as we did for motion tweening above to get the
results that float your boat.