Calendar for trimester two
Days left in trimester ![]()
Calendar for trimester two
Days left in trimester ![]()
Thursday - 26 January
As we said yesterday Layers - name them from the start - note where the arrow is in the image below. That is showing us that the black rectangle is the current layer.
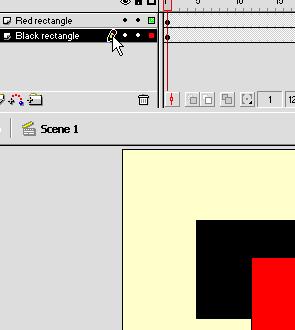
 By clicking on the X in the
Eye column we make that layer invisible...
By clicking on the X in the
Eye column we make that layer invisible...
![]() When you want to see the
layer but not do anything to it - lock it by clicking on the dot in the lock
column
When you want to see the
layer but not do anything to it - lock it by clicking on the dot in the lock
column
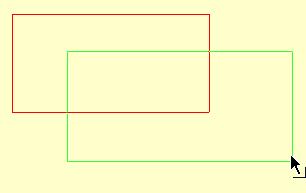
![]() If you want to just
see the outline and not what is in the image - for example the colour fill -
then click the square in the square column.
If you want to just
see the outline and not what is in the image - for example the colour fill -
then click the square in the square column.
you can change how your layers show

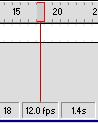
In the timeline below we have moved 18 frames in 1.4 secons
at the frame rate of 12 frames per second
If we have a long movie we can jump to the frame we are at by clicking the little red thingy as shown below, in the left corner - here I have jumped to frame 155
![]()
To add a key frame select where you want it and press F6 or Insert > Keyframe.
To tween between the two points, firstly click on the frame on the timeline you want to use then click 'Create Motion Tween'..
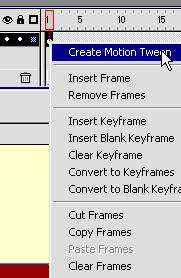
Your frames between your two keyframes will change colour and your object will move between the keyframes.
![]()